 |
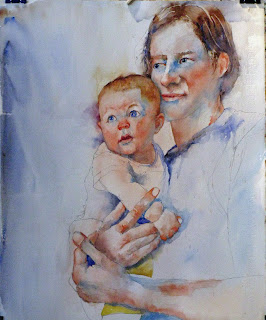
| initial 30 minutes of painting |
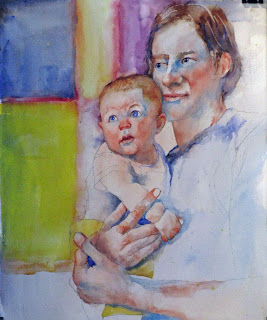
another hour or so this morning brought me a little closer to finale of this painting. more importantly i made a bolder move than usual to put in a more brightly colored background. the original photo from which i gained inspiration for this effort had a very colorful background wall of what appeared to be tile work with an intricate pattern. i didn't want an intricate pattern but thought the colors would be okay if i got the value and chroma spot on.
in this first session today i worked primarily on ben's hands. before that though, i scrubbed out the upper portion of his upper lip as it seemed too thick (and too defined). not sure where i am going with this at this point, but that will come later. additionally i believe that his head lacks some depth so although i haven't done anything about it yet, i will move his ear back about 1/2" and the back of his head a corresponding distance once i find my trusty "mr. clean eraser." in terms of the hands, i modeled them using cadmium red light, raw sienna, and cerulean blue mixing mainly on the paper. i used a #6 round for this work. the buzzer just went off which means break time.
 |
| next 30 minutes |
i started on the background after about a 20 minute hiatus of guitar playing (still working on croce's "you don't mess around with jim," and "it doesn't have to be that way"). i painted some blurry red stripes about where i wanted the transition from one color to the next to be trying to avoid tangents with the edges of other objects. i used a #10 round and carmine for this. i lost most of the edges of these stripes at this point. the inside of the squares were pretty much the pure colors you see although the ultramarine blue in the upper left was tempered with a touch of raw umber. i am using a 1" flat sable at this point. i'm not fond of the mineral violet next to ben's and atop sollie's head. i think will darken it with some bluer cooler color later. likewise the yellow seems a bit bright. i have been wanting to try an over wash of scrubbed in white over a background that is a bit too exuberant for a while. this may be the ideal spot to try this as long as i am in an experimental (when am i not, one might ask?) mood. i wanted to loosen up (change?) the stripes so i did a little perpendicular scraping along the stripes as the last step in this last session today.


I really like your color choices, both regarding the background and the faces of the subjects, also the expression in the little one's eyes is so good, a mix between wonder and curiosity :-) One thing though , and hope you won't mind me saying this, I think the finger on the little one's arm is a bit too long .
ReplyDeleteWhat do you use when you scrub something out ? A sponge ?
hi, jane. thanks for the comments. i don't mind some criticism at all....in fact that is one of the reasons i started this blog. i forgot to mention in the narrative that i, too, think ben's index finger is too long. i took about 1/4-3/8" off it on a re-paint. funny how that little bit made a huge difference. i will post it next time.
ReplyDeletenow on to your question. to start to get rid of a passage that i don't like it start by just lifting with a 3/4" flat synthetic brush...nothing too stiff....and blot the scrubbed colors.. as i don't use much in the way of staining colors this usually leaves a ghost of the image. then i use a "mr. clean magic eraser" (this is cleaning product that looks like a white, fine-grained sponge almost like sponge rubber.) i suspect something similar if not identical would be available in italy if you have "mr. clean" products.) i use the fine side and gently rub the damp sponge over the area. that usually leaves very little in the way of color...maybe a little tint. a couple of notes: first, while doing it it will seem that there are small pieces of paper are being taken off the surface....its not...it is the eraser; second, i have only done this on fairly well sized paper (i suspect it might shred a cheaper paper). then i let it dry and have another go.